
A signing session starts from the same window you use to generate a PDF. New to e-sign? Read the E-sign Overview first.
Before starting a session
Do not fill in signature dates for electronic signers, since the dates will be added when e-signing.
Start a signing session
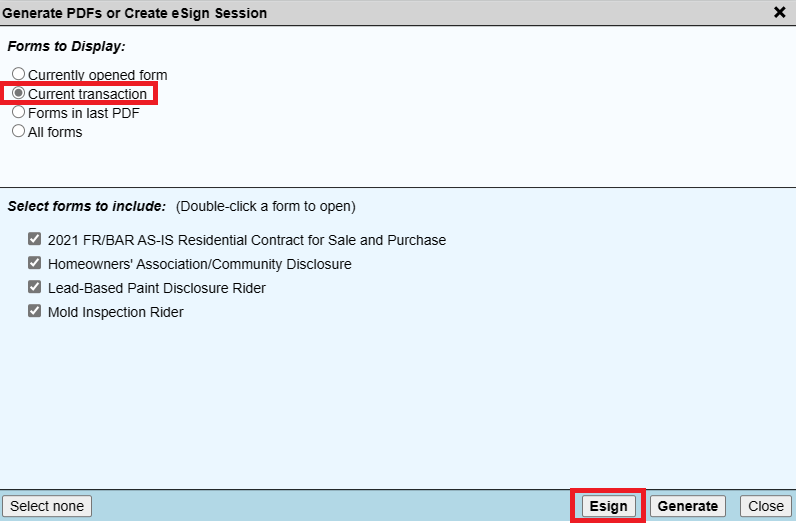
- Click PDF/E-sign and select the forms as you would for a PDF. See Printing and Generating PDFs.
- Click E-sign.
- Read the Authorization and E-sign Agreement, then tick I am the authorized user and have read and accept the AGREEMENT shown above.
- Click Accept and begin new E-sign session. This uses one of your signing sessions.
- When Open signing session becomes available, click it. The session configuration page opens, usually in a new browser tab.

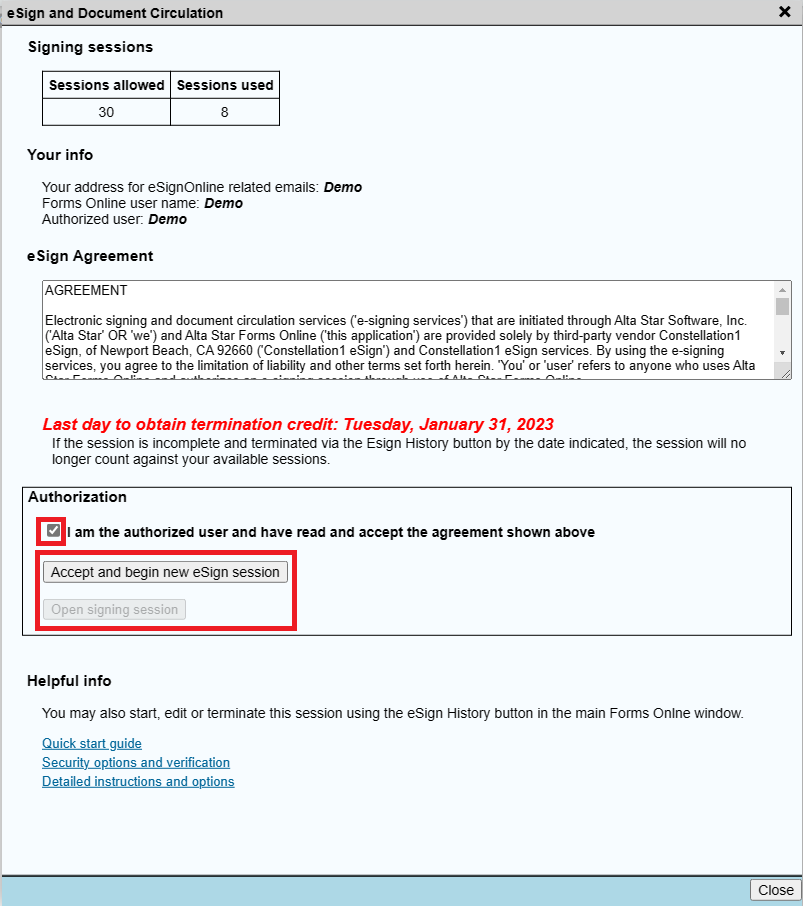
Note: The authorization window shows the last day to terminate the session with credit. An incomplete session terminated by then does not count against your sessions. See Credit Policy and Time Limit.
What happens next
The session configuration page opens with your selected forms already uploaded and their signing locations already in place. You add the signers, give each one a role, preview and send. See Configuring E-sign Sessions.
To come back to a session you started earlier, click E-sign History on the menu bar. See E-sign Status and Logs.