
New to e-sign? Read the E-sign Overview first.
This walkthrough starts after you click Open signing session in Alta Star Forms Online. See Starting E-sign Sessions for the steps before that. The session configuration page opens with your forms already uploaded and the standard signing locations already placed.
Required entries you will make
- Add the name and email address of each signer.
- Pick a role for each signer from a dropdown list, for example Buyer or Seller.
Other entries are optional.
Add signers
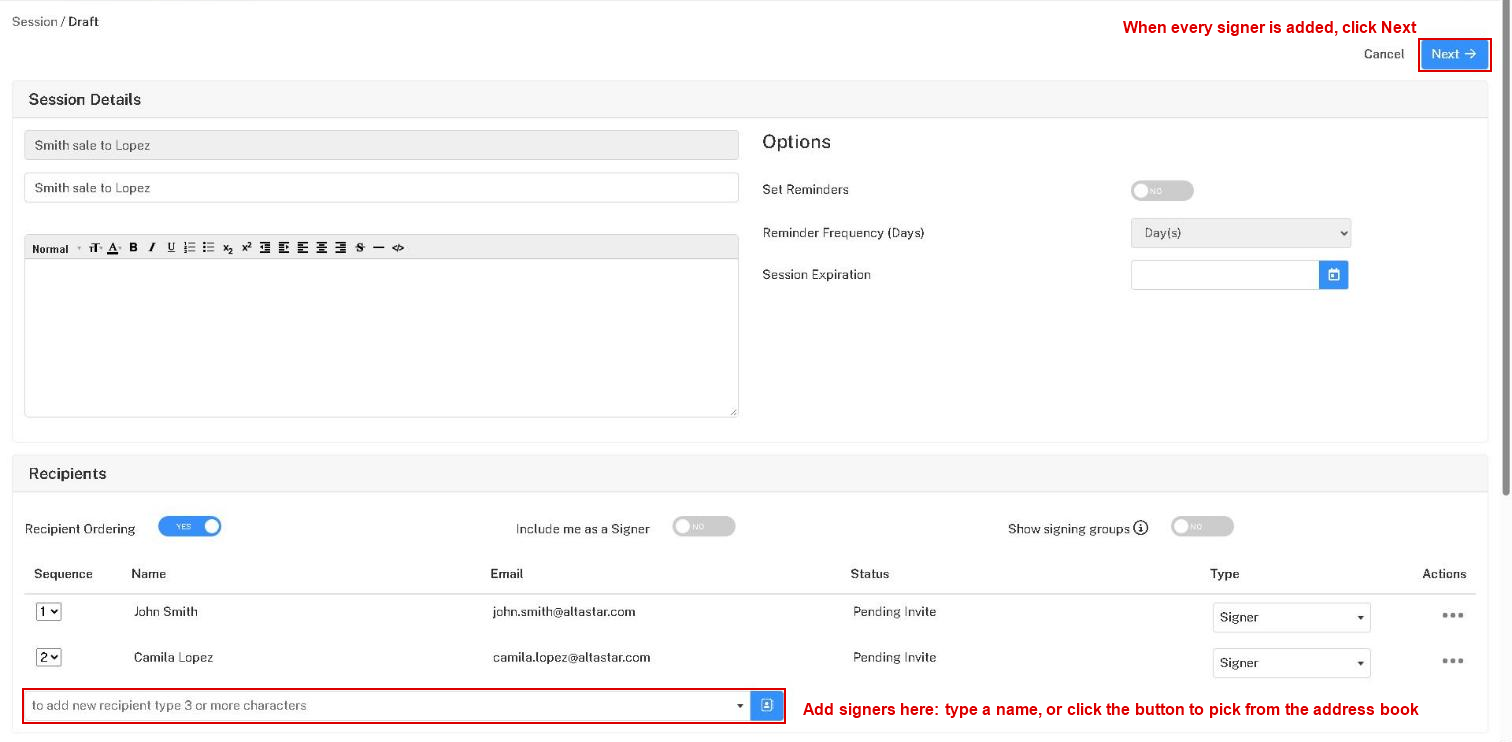
- In the Recipients section, enter a name in the field that reads "to add new recipient type 3 or more characters" and then click the + Add New Recipient button that appears, or pick previously used recipients from the address book
 .
- Enter the signer's first name, last name and email address.
- If you want the signer to prove their identity before signing, choose a security option in the Authentication box. See E-sign Security Options.
- Switch on any signer options you want. Most sessions need none. See Signer options.
- Click
 .
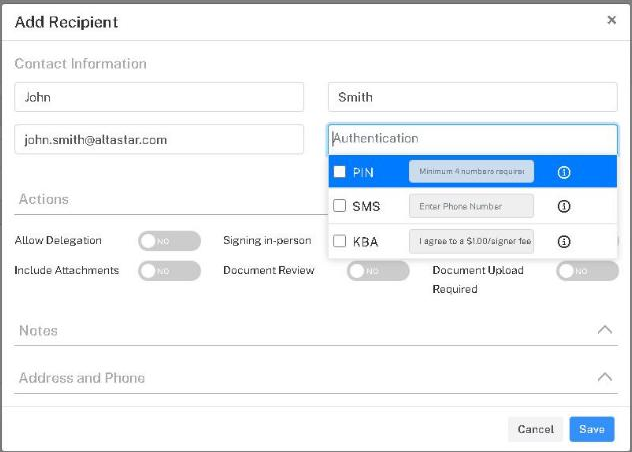
Repeat for each signer. Each one is listed under Recipients with the status Pending Invite and the type Signer. To make someone a reviewer or a copy recipient instead, see Signer type.
When every signer is listed, click Next at the top of the page.
Assign roles
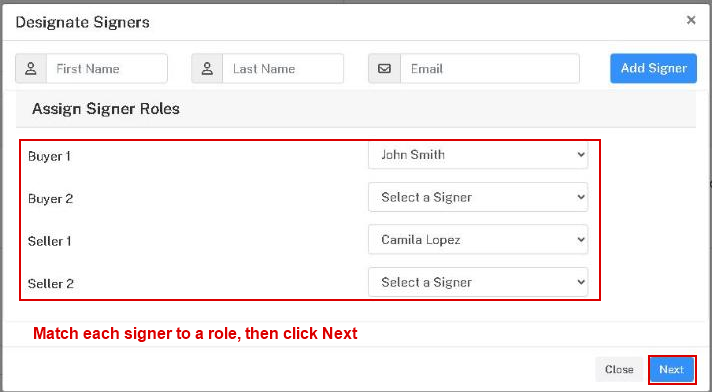
The forms have signing roles such as Buyer 1, Buyer 2, Seller 1 and Seller 2. In the Designate Signers dialog, pick a signer for each role that applies, then click Next.
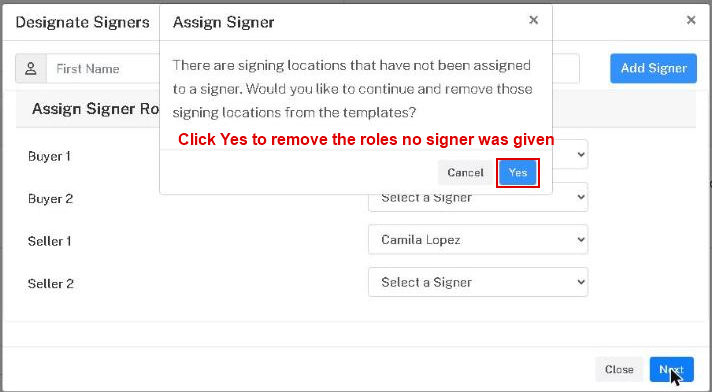
If the forms have more roles than you have signers, you are asked whether to remove the signing locations for the roles no signer was given. Click Yes. In the example, one buyer and one seller fill a form with four possible roles.
The message "Template(s) applied successfully" confirms the roles. Click Next at the top of the page again to go to the preview.
Preview and send
The preview page shows your documents with every signing location already in place. Page through each document to check it.
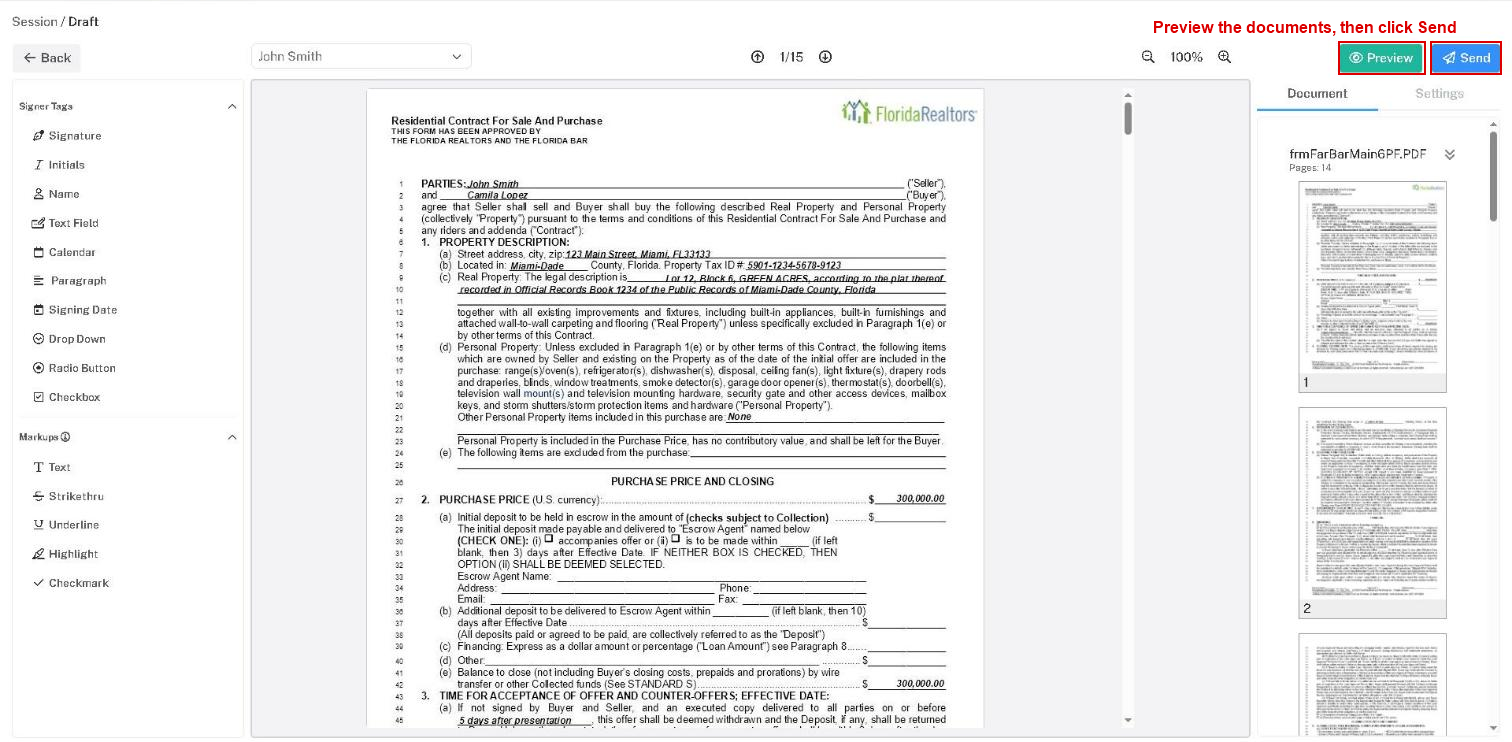
Each signer's locations are in a different color.
Click  . The invitations go out at once, with no further prompt, and the session status page opens. With Recipient Ordering on, the first signer is invited now and each later signer when the one before has signed. The session then shows as Sent in E-sign History.